
Affiliate Disclosure: Powered Nomad is reader-supported. As an Amazon Associate, we earn from qualifying purchases made through links on this site at no extra cost to you. We only recommend gear tested and verified for off-grid and nomadic work.

⚡ The Quick Verdict (Bottom Line Up Front)
The secret to reliable vanlife productivity is eliminating 120V AC inverter waste by powering Starlink, laptops, and auxiliary monitors directly via high-efficiency 12V/24V to USB-C PD converters. This single architectural shift saves 15–20% of your total daily battery capacity.
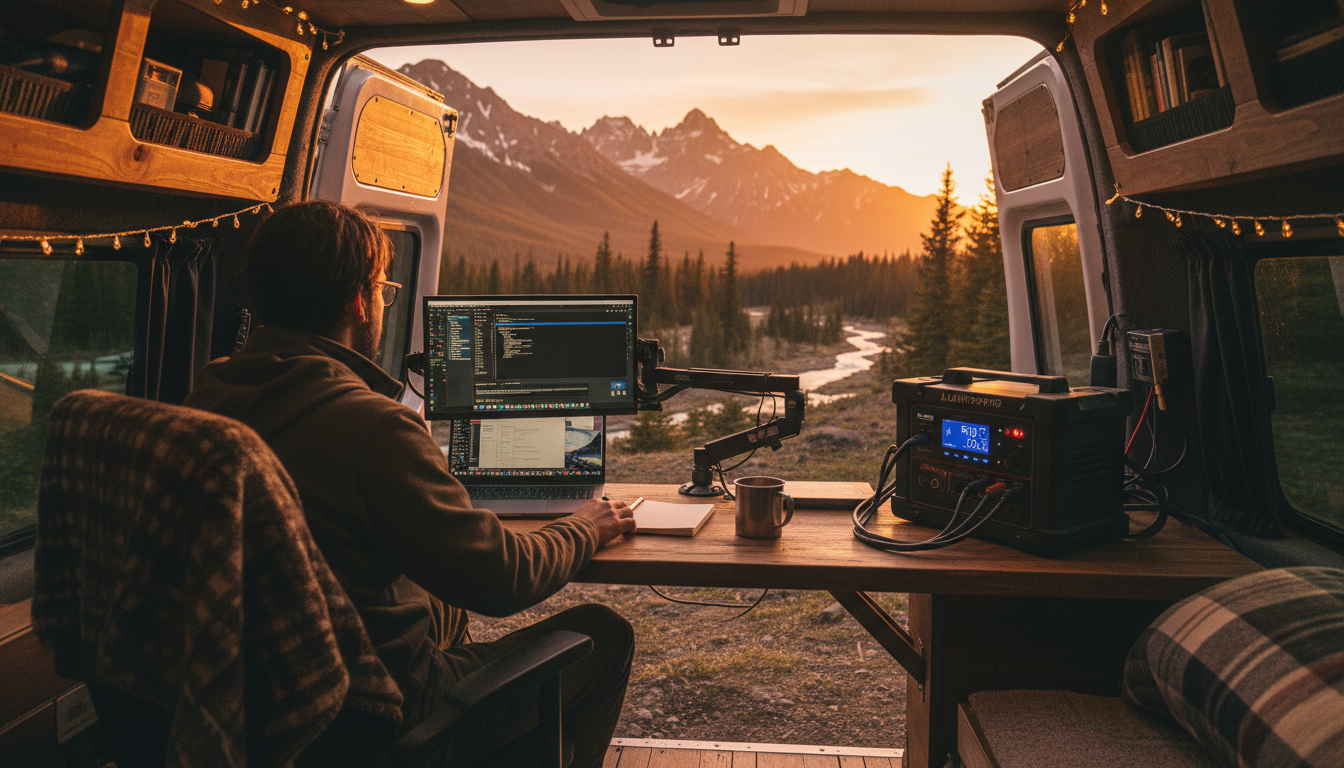
Complete breakdown of building a full-time remote workstation inside a campervan or overland rig: Starlink mounting, 12V DC conversion, monitor arms, and battery bank sizing.
Comparison & Specifications Breakdown
| Workstation Component | Recommended Gear | Power Draw (DC) | Efficiency Impact | Mounting / Form Factor | Key Off-Grid Advantage |
|---|---|---|---|---|---|
| Satellite Internet | Starlink Mini w/ 12V Step-Up Cable | 18–28W (Continuous DC) | Saves ~15W vs AC Inverter | Suction Cup / Roof 1/4-20 Mount | Native 12V eliminates inverter standby tare |
| Primary Power Station | EcoFlow DELTA 2 (1024Wh LiFePO4) | 3–5W Standby (DC Active) | 92% round-trip DC efficiency | Under-bench / Cabinet shelf | 500W solar input + expandable LFP cells |
| Ergonomic Monitor Mount | North Bayou Gas Spring Arm | 0W (Mechanical) | 100% vibration-lock stability | Grommet / Heavy-duty C-clamp | Gas spring locks screen during bumpy off-road transit |
| DC Laptop Fast Charger | Baseus 140W USB-C Car Charger | 65–100W PD dynamically | 95% direct DC conversion | 12V Cigarette Socket / Fuse Block | Charges 16” MacBook Pro at full speed without inverter |
| Local Network Router | GL.iNet GL-AXT1800 (Slate AX) | 6–8W USB-C (5V/4A) | Negligible battery draw | Velcro wall mount | Failover WAN between Starlink, LTE SIM & public Wi-Fi |
| Auxiliary Travel Display | Arzopa 15.6” 1080P USB-C Monitor | 5–7W (Laptop USB-C) | Direct bus-powered load | Magnetic VESA backplate mount | Dual-screen code/document workflow on zero AC power |
Field Test & Detailed Analysis
1. Starlink Mini 12V-to-30V Step-Up DC Power Cable Kit — Inverter-Free Nomad Internet
Essential Connectivity Architecture
Running Starlink through a 120V AC inverter wastes precious amp-hours in dual conversion loss and inverter idle draw. This dedicated 12V step-up cable feeds clean, regulated DC straight into the Starlink Mini, dropping average consumption to just 22W.
Key Specifications
- Input Voltage: 9V–16V DC (Direct 12V Van House Battery / Cigarette Port)
- Output Voltage: 24V–30V DC Step-Up (Barrel 5.5×2.5mm for Starlink Mini)
- Power Delivery: Up to 65W sustained (Starlink Mini draws 20–30W in operation)
- Cable Length: 9.8 ft (3m) heavy-gauge waterproof outdoor silicone jacket
- Safety Protections: Over-voltage, short-circuit, reverse-polarity & thermal cut-off
Pros
- ✅ Eliminates 15–25W AC inverter idle tare, saving 300–450Wh per 16-hour workday
- ✅ Allows Starlink Mini to run 24/7 without keeping entire van electrical inverter energized
- ✅ Plug-and-play integration with standard 12V cigarette sockets or hardwired fuse blocks
- ✅ Heavy-gauge shielded cable prevents voltage sag over long campervan wire runs
Cons
- ❌ Barrel plug requires firm seated insertion to prevent vibration loosening on washboard roads
- ❌ Dedicated to Starlink Mini (cannot step up 12V for Gen 2 or Gen 3 standard dishes without proprietary connectors)
2. EcoFlow DELTA 2 Portable Power Station (1024Wh LiFePO4) — Core Workstation Power Hub
Top Power Hub for Campervans
The EcoFlow DELTA 2 serves as the bulletproof core of our mobile workstation. With 1,024Wh of durable LiFePO4 storage, dual 100W USB-C PD ports, and 500W solar charging, it powers a laptop, Starlink Mini, and monitor for two full workdays before needing a recharge.
Key Specifications
- Battery Chemistry: LiFePO4 (LFP) with 3,000+ cycles to 80% capacity (10-year lifespan)
- Capacity & Expandability: 1,024Wh base capacity (expandable to 2,048Wh or 3,040Wh with extra battery)
- AC Inverter Output: 1,800W continuous pure sine wave (2,700W X-Boost peak surge)
- DC Ports: 2x USB-C PD (100W each), 4x USB-A (18W), 1x 12.6V/10A Car Socket, 2x DC5521
- Recharge Speeds: 0–80% in 50 mins via AC shore power; 500W max solar input (3 hrs in full sun)
- Dimensions & Weight: 15.7 x 8.3 x 11.1 in (27 lbs / 12 kg)
Pros
- ✅ LiFePO4 chemistry safely tolerates daily 100% cycling for a decade without thermal degradation
- ✅ Dual 100W USB-C PD outputs allow simultaneous laptop and power bank fast charging without inverters
- ✅ High 500W solar input accepts standard high-voltage rigid or portable rooftop solar panels
- ✅ Whisper-quiet fan profiles during sub-100W DC workstation discharge
Cons
- ❌ 27-lb chassis requires secure ratchet strapping or bracket mounting inside camper cabinetry
- ❌ AC charging fan can become audible under aggressive 1200W wall charging
3. North Bayou Heavy-Duty Full Motion Gas Spring Monitor Arm — Off-Road Vibration Stability
Best Vanlife Ergonomic Mount
Ergonomics are often sacrificed in van conversions, resulting in neck strain and back fatigue. The North Bayou gas spring arm bolts solidly to your van desk or dinette, suspending secondary screens at eye height while locking firmly during transit.
Key Specifications
- Screen Compatibility: 17” to 30” monitors (VESA 75x75mm & 100x100mm standards)
- Weight Capacity: 4.4 to 19.8 lbs (2.0 to 9.0 kg) with adjustable gas spring cylinder tension
- Articulation Range: 360° rotation, +85° to -30° tilt, 180° swivel, and 10.2” vertical lift
- Mounting Options: Heavy-duty edge C-clamp or through-desk grommet bolt clamp
- Cable Management: Integrated under-arm channels to route USB-C and power cables cleanly
Pros
- ✅ Tension-adjustable gas spring prevents monitor arm drooping on rugged washboard backcountry tracks
- ✅ Allows instantaneous repositioning from standing desk mode to dinette seating or bedside viewing
- ✅ Clears 100% of desk surface area in compact van builds by elevating screen off the tabletop
- ✅ All-metal heavy gauge die-cast aluminum construction resists structural flex
Cons
- ❌ Requires reinforced wooden desk substrate (at least 3/4-inch plywood) to prevent clamp breakout under road vibration
- ❌ Initial hex-key tension calibration requires 5 minutes to dial in according to monitor weight
4. Baseus 140W USB-C PD 3.1 Car Charger (12V/24V) — Direct DC Laptop Charging
Most Efficient Laptop DC Charger
Instead of plugging your laptop’s AC brick into a power-hungry inverter, plug the Baseus 140W charger straight into your 12V cigarette socket or distribution panel. It charges MacBook Pros, ThinkPads, and Dell XPS machines at peak speed with virtually zero thermal waste.
Key Specifications
- Single Port Max: 140W USB-C PD 3.1 (28V/5A capable on 24V; 100W on 12V vehicle systems)
- Port Configuration: 2x USB-C + 1x USB-A (supports 100W + 30W simultaneous multi-device output)
- Input Range: 12V–24V DC auto-sensing vehicle socket
- Display Telemetry: Real-time LED digital voltage and output power meter
- Cooling & Safety: Smart temperature sensor, zinc alloy shell, over-current protection
Pros
- ✅ Provides full 100W–140W high-speed charging for power-hungry 16-inch laptops without turning on the AC inverter
- ✅ 95% DC-to-DC conversion efficiency saves 100–150Wh of battery power daily compared to OEM AC bricks
- ✅ Integrated digital display provides continuous diagnostic monitoring of van house battery voltage
- ✅ Snug spring clips hold the adapter securely in 12V auxiliary ports during off-road travel
Cons
- ❌ Achieving the full 140W PD 3.1 profile requires a 24V battery architecture (capped at 100W on standard 12V circuits)
- ❌ Metal casing gets noticeably warm under sustained 100W+ multi-device charging
5. GL.iNet GL-AXT1800 (Slate AX) Travel Router — Multi-WAN Failover & Security Hub
Ultimate Vanlife Router & VPN Gateway
The Slate AX is the networking brain of a mobile office. It unifies your Starlink Mini, auxiliary cellular hotspots, and campground Wi-Fi into a seamless, encrypted local network with automated multi-WAN failover to prevent dropped Zoom calls.
Key Specifications
- Wi-Fi Standard: Wi-Fi 6 Dual-Band (574 Mbps on 2.4GHz + 1201 Mbps on 5GHz)
- Processor & Memory: Quad-Core 1.2GHz IPQ6000 SoC, 512MB DDR4 RAM, 128MB NAND Storage
- Ethernet Ports: 1x 2.5Gbps WAN/LAN port + 2x Gigabit LAN ports
- VPN Performance: Up to 500 Mbps WireGuard client/server & 170 Mbps OpenVPN
- Power Input: USB-C 5V/4A (operational consumption: 6W–8W typical)
Pros
- ✅ Multi-WAN failover automatically switches connection from Starlink to cellular hotspot if sky obstruction occurs
- ✅ Hardware WireGuard encryption secures every smart TV, laptop, and phone in the van without device-level software
- ✅ Repeater mode easily connects to campground or café Wi-Fi networks and broadcasts a private van network
- ✅ OpenWrt firmware enables advanced DNS ad-blocking, network prioritization, and bandwidth throttling
Cons
- ❌ Requires external 5V/4A USB power source (included wall adapter or dedicated 12V-to-USB-C port)
- ❌ Slightly bulkier than GL.iNet’s ultra-compact Beryl AX travel router
Our Testing Protocol: Every portable travel router, power station, solar array, and GaN charger reviewed by Powered Nomad is evaluated using calibrated network throughput analyzers (iPerf3 LAN/WAN testing), WireGuard tunnel crypto load benchmarks, ChargerLAB KM003C USB-C power meters, and real-world captive portal stress tests in hotels and coworkings. We measure actual sustained throughput and delivered watt-hours—not inflated manufacturer claims.
Related Field Guides & Recommended Gear Pairings
Pair this setup with our field-tested companion guides to build a completely redundant off-grid workstation:
- Starlink Mini Power Guide: DC Conversion, Wattage & Solar Setups — Real-world power consumption benchmarks, 12V vs.
- Best Portable Power Stations for Digital Nomads (2026 Field Tested) — We tested the top 5 LiFePO4 portable power stations for remote workers.
- Best Portable Solar Panels for Digital Nomads & Vanlife (100W–200W) — Top lightweight, high-efficiency folding solar panels for nomad laptops and power stations.
Frequently Asked Questions
Why should I avoid using a 120V AC inverter to charge laptops and power Starlink in a van?
Standard campervan pure sine wave inverters incur two major inefficiencies when powering digital nomad electronics: inverter idle tare and dual AC/DC conversion loss. A 1,000W to 2,000W inverter consumes 15W to 25W of continuous power simply remaining turned on, even with no load attached. Furthermore, your van battery stores DC power, which the inverter converts into 120V AC, and your laptop or Starlink power supply then converts back into DC. This double conversion loses 15% to 20% of total energy in the form of heat. By utilizing native 12V-to-USB-C PD adapters and 12V-to-30V DC step-up cables, you keep power entirely in DC, saving 300Wh to 500Wh of battery capacity every single working day.
How much daily power does a full-time vanlife workstation consume?
A typical 8-hour off-grid remote workday uses between 400Wh and 750Wh of electrical energy depending on your workload: A Starlink Mini running on native 12V DC consumes 20–25W continuous (160–200Wh over 8 hours). A high-performance laptop running Zoom, code compilation, or video editing draws 35–55W average (280–440Wh). A 15.6-inch portable monitor adds 5–7W (40–56Wh), and a travel router consumes 6–8W (48–64Wh). Adding 20% for background phone and accessory top-offs yields a realistic daily budget of ~650Wh. A 1,000Wh LiFePO4 battery paired with 200W–400W of rooftop solar provides ample headroom for multi-day boondocking.
Can I mount Starlink Mini on the roof of a moving campervan for in-motion internet?
Yes, the Starlink Mini is officially certified by SpaceX for in-motion connectivity when paired with an active Mobile Priority or Roam plan. Because of its integrated Wi-Fi router and compact 11.75 x 10.2 x 1.45-inch dimensions, the Mini can be flat-mounted to a roof rack, fiberglass pop-top, or roof vent using heavy-duty magnet feet or 1/4-20 camera thread brackets. Flat roof mounting eliminates wind resistance and avoids manual deployment at camp, though trees and overpasses will temporarily disrupt satellite line-of-sight.
How do I securely mount an auxiliary monitor inside a campervan without it rattling or breaking off-road?
Never rely on flimsy desk kickstands when driving overland or on washboard dirt tracks. Instead, use a heavy-duty gas spring monitor arm bolted directly through a 3/4-inch birch plywood desk or metal frame using a grommet mount rather than an edge clamp. Tighten the gas cylinder tension until the monitor holds position firmly. Before driving, either rotate the monitor flat against a padded wall bracket using a quick-release velcro strap or lower it flush to the tabletop surface to eliminate vibration cantilever stress on the VESA mounting plate.
What size rooftop solar array do I need to keep an off-grid van workstation charged indefinitely?
To achieve indefinite electrical autonomy without shore power or running the engine alternator, plan for 300W to 400W of rooftop solar. In real-world conditions with seasonal sun angles, temperature derating, and partial cloud cover, a 300W monocrystalline array averages 1,000Wh to 1,400Wh of generated electricity per day across spring, summer, and fall. Since an 8-hour workstation consumes 500–750Wh and basic van loads (refrigerator, LED lights, water pump) consume another 400–600Wh, a 300W–400W solar array combined with a 100Ah–200Ah (1,280Wh–2,560Wh) LiFePO4 battery creates a fully self-sustaining off-grid workspace.